You’ll usually learn about motorcycle hand signals in your basic motorcycle instruction course. But a lot of riders don’t bother to remember them once they’re done. Isn’t that what turn signals are for? you might ask. Who actually uses hand signals? you wonder. Aren’t those for bicyclists?
Motorcycle hand signals are actually useful because they can communicate a lot more information than a simple turn signal. Turning left or right, stopping for gas and hazards in the road are just a few of the key ideas that a hand signal can communicate.
If you’re ever planning on doing group riding of any size, motorcycle hand signals are something you need to know to communicate effectively with fellow riders. They help the lead rider in a group communicate with the riders in their pack while motorcycle riding. Even if you’re not planning to lead a ride any time soon, you might need to understand the hand signals your group leader uses, especially if you or someone else in the group is riding without a motorcycle communication system.
These are nine hand signals that any biker should recognize. Learn them, practice them and use them whenever necessary.
1. Left Turn
To signal a left turn, simply extend your left arm straight out from your body with the palm facing down. This is one of the simplest motorcycle signals to use and is a great first signal to practice. If you’re leading, this signal can be used to direct the group of motorcyclists, while if you’re following, it can signal that you’re breaking away. When signaling, ensure your left arm is fully extended and your palm facing downward to clearly communicate your intentions to others on the road.
2. Right Turn
Obviously, you need to keep your right hand on the handlebars to maintain control of the gas and brakes. So, to signal a right turn, you’ll extend your left arm, bend your elbow upward into a 90-degree angle and make a clenched fist with your left hand. Once again, this signal can either direct fellow riders or alert them that you’re breaking off. Learning this motorcycle right turn hand signal is a solid skill for every biker, ensuring safety and clear communication.
Upgrade Your Ride with Motorcycle Helmet Bluetooth Tech – Shop Now!3. Speed Up
On a motorcycle, you usually want to be moving slightly faster than the traffic around you. This can be a problem for less-experienced groups, and in such situations, a more experienced group leader should deploy the “speed up” signal to tell the rest of the group to match the leader’s speed. You can execute this signal by extending your arm out with your palm up and then swinging it in an upward motion. Riding together on an open road becomes smoother when everyone can use hand signals effectively.
4. Slow Down
This signal alerts your group to slow down. It’s particularly useful to communicate when you’re using engine braking to slow your bike rather than hitting the brakes, as engine braking doesn’t engage the brake light. Extend your arm with the palm down as if you’re signaling a left turn and then repeatedly swing your arm down to signal for slowing down. Teaching your fellow riders how to use motorcycle hand signals, including the signal to slow down, ensures a safe and coordinated group ride.
5. Stop
The “stop” signal involves a slightly awkward motion, but isn’t too difficult. Hold your left arm out at a right angle from your body with your open palm and your fingers toward the ground. If you’re riding in a large group of fellow riders, other riders should pass this signal back through the group until everyone is aware of the impending stop. Mastering these universal hand signals and how to pass them along in a group is essential for motorcycle riding, ensuring safety and smooth communication among motorcyclists.
Discover the Packtalk Pro – The Ultimate Communication Solution!6. Roadway Hazard
There are two ways to signal a hazard in the road, depending on whether it’s to the left or right of the signaler. To signal a roadway hazard on the left, point diagonally at the ground with your left arm. To signal a roadway hazard on the right, stick out your right leg from your bike. This one is worth practicing so that the right foot and leg motion feels natural and safe when traveling at speed. A hazard on the side of the road can be especially dangerous, so using universal hand signals is key to alerting your fellow riders and creating a safer experience for everyone.
7. Follow Me
To signal other riders to follow you, raise your left hand straight up into the air above your head, like you’re raising your hand to be called on. You can use this signal to break off a smaller group from a larger one, but make sure to work out which group members need to follow which leader ahead of time. This signal is particularly useful when motorcyclists need to stay organized during group rides on highways or busy roads. Effective communication ensures the rest of the group knows how to respond and follow along, crucial for any seasoned or beginner biker.
8. Comfort/Refreshment Stop
These two signals are for occasions when you need to pull off to stretch your legs or grab some refreshments. For a comfort stop, extend your left hand and shake your fist up and down. (Make sure the shoulder is clear and safe first.) For a refreshment stop, make the thumbs-up sign with your left hand and place your thumb to the visor of your helmet as though it’s a straw. If the group is riding in a single-file formation, ensure the motorcycle riders at the back can see the signal to avoid confusion. During longer trips, a fuel stop may be necessary. Make it clear by pointing at your fuel tank before signaling to stop.
9. Pull Off
This signal is for a serious situation that necessitates pulling off the road ASAP (either on the shoulder or at the next exit). Point your finger up and to the left and then swing it in an arc over your head to the right. Don’t use this signal for a simple comfort or refreshment stop. Whether riding side-by-side or in a double file arrangement, this signal needs to be clearly visible to all riders for safety.
From Signals to Seamless Communication — Cardo Makes It Easy!
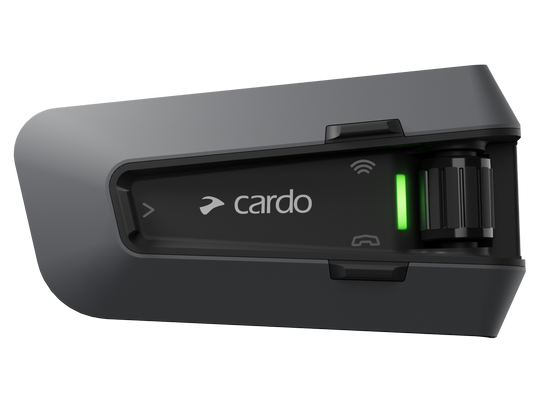
Cardo Systems offers a range of motorcycle headsets designed to replace outdated hand signals with smooth, hands-free communication. These devices make riding safer, easier and more connected, especially in group settings. Whether it’s a challenging group ride or just a casual trip, Cardo takes motorcycle communication to the next level, ensuring you can leave hand signals behind while staying safe and connected. Here’s how Cardo makes it happen:
Stay Connected with Dynamic Mesh Communication (DMC)
Cardo’s DMC technology keeps up to 15 riders linked in a flexible network. Unlike standard Bluetooth that can be tricky when someone lags behind or drops off the ride, DMC auto-adjusts. Riders can join or leave the group without interrupting the flow of motorcycle communication. That means no more waving your arms to get someone’s attention. It’s all handled seamlessly.
Hands-Free Convenience
With simple voice commands like "Hey Cardo," you can control your device without moving a finger. Whether you’re adjusting settings, making a call or accessing Siri or Google, it’s all hands-free. This keeps your focus on the road and your hands on the handlebars, making everything safer and more convenient.
Master the Signals, Master the Ride
Mastering motorcycle hand signals is more than just a practical skill — it's a way to ensure the safety and harmony of your rides. Along with other motorcycle safety gear, these signals play a crucial role in keeping you and your group secure on the road. By memorizing and practicing these signals, you'll build confidence in communicating with your fellow riders — whether navigating highways, signaling stops or handling unexpected situations. Clear, consistent signaling keeps everyone on the same page, creating a seamless riding experience. Use them to supplement your Bluetooth motorcycle helmet for a safer, more coordinated ride.


